


We independently evaluate all recommended products and services. Any products or services put forward appear in no particular order. If you click on links we provide, we may receive compensation.
When it comes to knife sharpeners, there’s a decent amount of choices – but what’s interesting about this market is that no one really agrees on what the best type is, much less what the best brand or model is. I suppose there are several ways to skin a cat, and knife sharpener preference boils down to how you want to go about putting an edge on your knife – as well as what kind of knife you’re trying to sharpen. There are pull through sharpeners, freehand whetstones, croc sticks, diamond rods, guided sharpeners, freehand angle sharpeners, powered sharpeners – heck, Tormek will sell you a rotating stone wheel with a water supply and a guide if you’re so inclined.
![]()
Sharpeners are all a matter of preference on what technique you’re most comfortable with, and what style of sharpener you get the best results with. I’ve tried out a LOT of sharpeners over the years, my first being a basic Spyderco Tri-Angle Sharpmaker (that still gets regular use! If it ain’t broke, don’t fix it!) but most recently I tried out this Lansky Deluxe kit and several manual sharpeners from Work Sharp. I ended up really liking the Angle Set knife sharpener, mostly because it seemed like an upgrade to the concept of the old school Sharpmaker and I was able to get really good edges with it.
But the nice folks at Work Sharp keep coming out with new products, so my cup runneth over with things to make knives sharp. In this Work Sharp knife sharpener review, I’ll be taking a good look at two of them today, both great products – but this is a study in using the right tool for the job, because both of these sharpeners are ideal for different types of sharpening. We’ll take a look at both and their competitors and give you a verdict on them as well as take a closer look at the different types of sharpening you might be doing.
But First, A Little About Work Sharp
The name Work Sharp should be familiar to you if you’ve spent any time in knife enthusiast circles – they’ve been making sharpeners since 1973 when the company was founded in Beecher, Illinois as DAREX. (The D, A, and R standing for the first initials of three generations of the founders.) Darex moved to Ashland, Oregon in 1978 – deep in the heart of knife maker territory in this country – and have stayed there since. Darex founded Work Sharp as well as Drill Doctor (who makes products for sharpening drill bits) but in a twist, the company sold off Darex (who makes industrial sharpening equipment) in December of 2020 and is now doing business as Work Sharp. They make a wide variety of knife sharpeners, from manual keychain-sized sharpeners through more complex guided sharpeners, but they’re most well-known for the electric powered Knife & Tool Sharpener, and the Ken Onion collaboration version of said tool. Which brings us to our first review item.
Knife & Tool Sharpener Mk.2
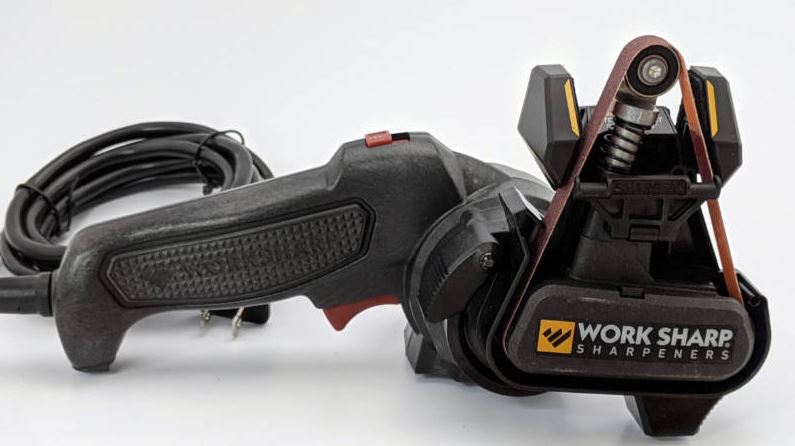
The Mk2 variant of the Knife & Tool sharpener came out late last year to replace the original, bringing a number of improvements to the already well-loved powered knife sharpener. But if you’re not familiar with the basic Knife & Tool Sharpener, a quick run-down: it uses an electric motor to drive a cassette which spins a flexible abrasive belt in one direction. The tool ships with a kit of several different grit belts, so you start with low grit belt for profiling and then a medium to sharpen and a fine grit to hone – just like a regular knife sharpener.
The Mk2 brings with it a two-speed electric motor – the Mk1 had a fixed motor and the Ken Onion has a variable speed motor - which allows a low speed for knives, or a high speed for tools to remove material more quickly. The angle guide has been redesigned – the old model had interchangeable guides, one for 40° inclusive (for kitchen knives) and another for 50° inclusive or 65° (for outdoor knives and scissors.) The Mk2 combines these into a single switchable guide, with an up-down toggle that lets you go from 20° (per side, 40° inclusive) to 25°. They’ve also added an Edge Guide to the tool which supports the blade along the full travel from tip to heel for a more stable, even edge.
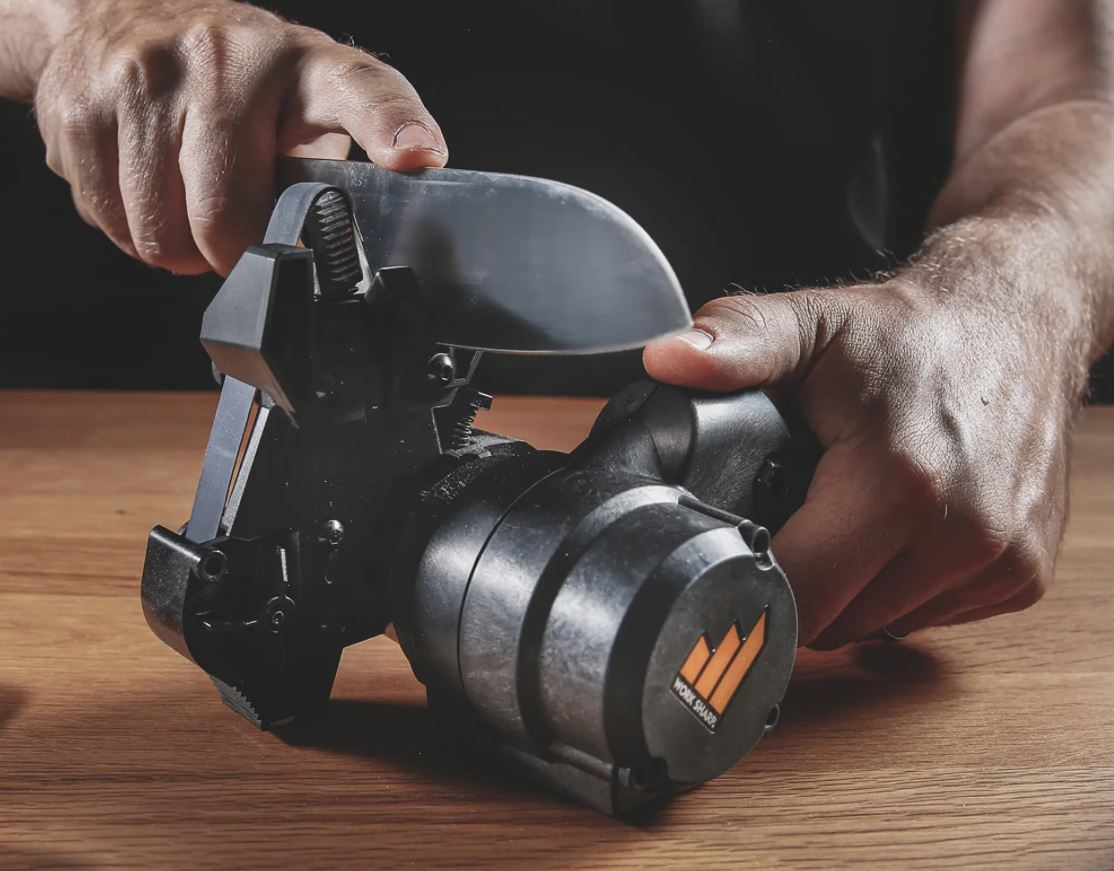
The Knife & Tool Sharpener is intimidating to use at first for someone who’s spent their whole life on manual sharpeners, but the learning curve is relatively short. The first thing you do is select which belt you’re going to use: the coarse grit (80) is pretty aggressive, normally reserved for repairing and reprofiling (like a chipped edge or a broken tip). Mounting the belts is a cinch: the tensioner at the top of the cassette pushes down and turns clockwise to lock in place, and then you place a belt on the three rollers and pop the tensioner back up to tighten the belt. A couple of turns by hand are a good idea to make sure it’s properly seated. Then you select the motor speed: low is what you’re going to want to use on knives, unless you have a LOT of material to remove, as running a knife against that belt on high can get it mighty hot, which can theoretically effect the temper of the blade. Also, on softer steels it’s entirely too easy to remove more material than you were planning to with the 80 grit belt on high, so it’s best to either avoid this or practice on a gas station knife you don’t mind tossing out.
Once you’ve got your belt mounted and the motor speed selected, you flip up and snap the blade guide into place and place the side of the blade on the vertical guide with the edge on the blade guide. You slide it all the way forward, and while holding the blade steady you pull the trigger with one hand while you slide the blade backwards at a constant rate, holding the side of the blade flat against the vertical guide to maintain a constant angle. You do a couple passes this way, until you build up a burr on the opposite side of the blade which indicates that you’ve apexed the edge. Then you switch sides and repeat the same number of passes. How many passes depends on the steel, heat treat, how dull the blade is, and which belt you’re using – harder steels will take more passes, softer steels will sometimes only take two or three.
Once you’ve achieved a burr on your course belt, you’ll swap the belt out for the next higher grit – so if starting with coarse you’ll move to the medium (220 grit) belt. This belt sharpens the edge, so if you have a knife you’ve already sharpened before that just needs touching up normally you can start on this belt. This belt normally takes less time than the coarse belt since you’ve got less to do once the edge is already established, so a couple of passes on this one then a few alternating passes to even out the burr and you’re ready to switch to the fine belt. This 6000 grit is more of a polishing belt, so I found it worked best doing alternating passes until I’d achieved a finish I liked.
Results with this powered sharpener are good with some caveats. You absolutely MUST know what you’re doing before you use this thing, you can mess a knife up in no time flat with this device. Removing too much material is easy, and rounding the tip of a knife off is even easier if you draw the blade too far back. It will put a very sharp edge on a blade but by design will never be as perfect as a guided rod sharpener – the flexible belt leaves a mildly concave surface to your edges that doesn’t happen on a rod sharpener.
My impression of this is that it’s a fantastic tool if you want to get a knife “sharp enough” and don’t have hours of free time to spend doing it – more of a functional sharpener and less of a hobby sharpener, but very effective at what it’s designed for. Also, the added versatility of being able to sharpen tools or scissors makes this a very useful device indeed – there’s a 65° scissor guide on the left side of the cassette, and you can flip down the edge guide and rotate the whole cassette 90° to the right to sharpen tools – an 80 grit belt with the motor set to high will put a good edge on an old lawn mower blade or an axe head (secured in a vice, obviously). I’d love to see Work Sharp combine the upgrades from this new version with the fine tune adjustments of the Ken Onion Edition sharpener in the future – best of both worlds. The Knife & Tool Sharpener Mk2 offers a lot of functionality for its $100 MSRP.
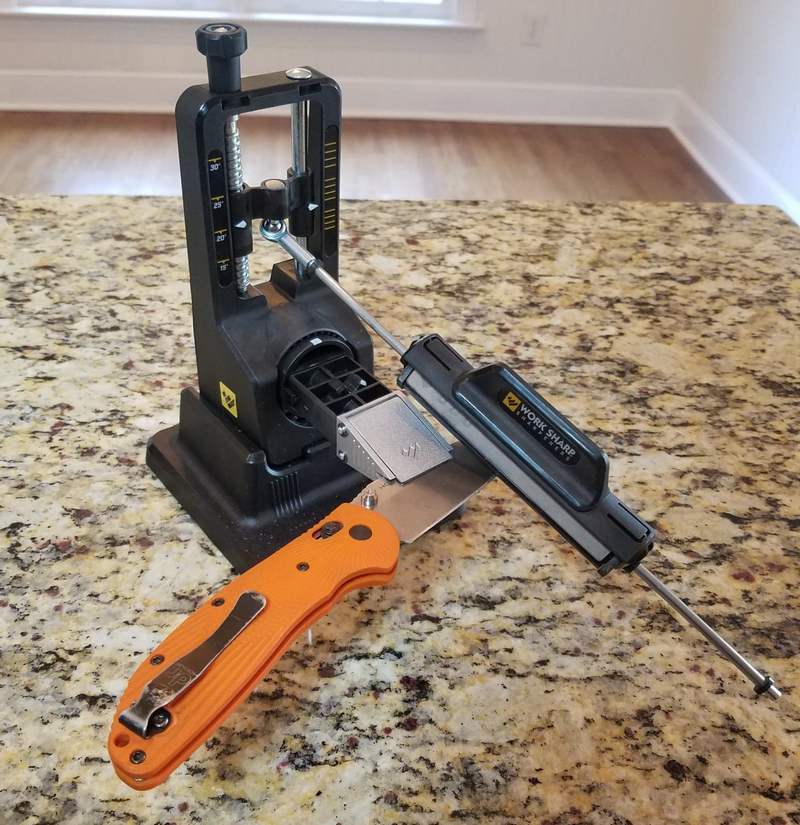
Precision Adjust Knife Sharpener
Speaking of hobby sharpeners – if you’re an edge snob, this will be much more up your alley than the “get ‘er done” powered Knife & Tool Sharpener. The Precision Adjust knife sharpener is more along the lines of an Edge Pro Apex or KME as discussed in our “Best Knife Sharpener for Your Money” article last year, a design where the blade is fixed in place and you run a guided rod with various abrasives over the edge until it’s perfect. All of these style systems vary in execution but function the same, except the Work Sharp version undercuts a KME by… 2/3 of its base price. This Work Sharp kit retails for only $60, so you’d be forgiven for assuming it doesn’t work as well as a KME or Apex, but the places they’ve cut cost here actually makes a ton of sense.
The Precision Adjust sharpener is a vertical assembly that slots into a wide base for stability. The knob at the top turns a threaded rod which positions the guided rod assembly relative to the blade, and it allows for fine adjustments – while the Knife & Tool sharpener only gives you a choice between 20 and 25 degrees, the Precision Adjust has a range from 15°-30° (which actually beats the KME’s 17-30 spread), marked off in 1° increments so you can fine tune your edges exactly as you want them – the hash marks on the left obviously marking 5° increments, and the closer marks on the right showing 1° increments. This is adjusted just by turning the knob left or right and aligning the base with the markings.
The blade clamp collet is pretty slick – turn the knob all the way counter clockwise to open it, then insert a blade (spine first, obviously) in the middle, then turn the knob clockwise to tighten it down. The inside of the clamp collet is padded to avoid damaging the knife’s finish. The collet inserts into the sharpening chassis in a round hole, and a set of magnets secures it firmly in place. Another neat trick: to switch sides, you push out on the rear of the clamp collet mount and rotate 180° then release, and the collet pops back into place securely facing the other direction.
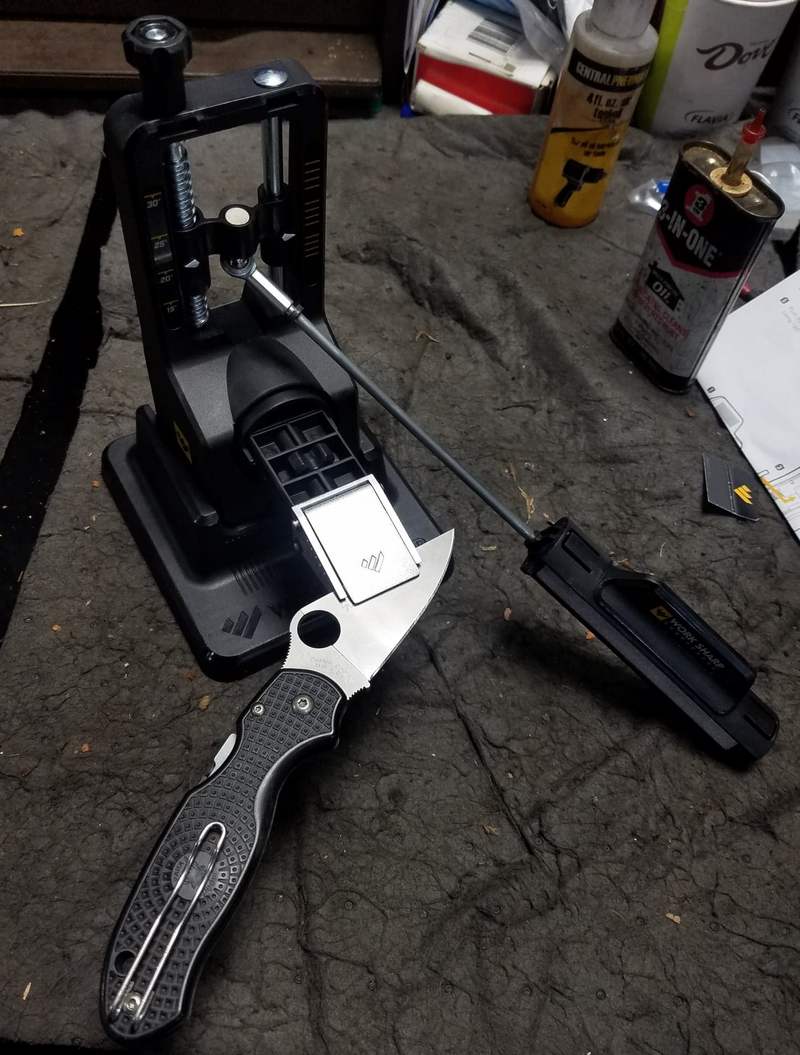
Once you’ve got the blade mounted in the collet, you attach the sharpening rod to the chassis – the metal pin in the end slides up vertically into the round slot, which secures in place with a strong magnet. The end of the sharpening rod has a spherical bearing between it and the section that slots into the chassis. This is important because it allows the sharpening rod to maintain a constant angle while you’re sharpening throughout the range of motion. In comparison to things like the Lansky setup, there is much less play in the movement of the rod which gives you a more consistent angle as you sharpen – which, obviously, is the key to a good sharpening job.
The Precision Adjust sharpener comes with a “tri-abrasive rod”, with a different grit on all three sides: a medium 320 diamond grit, fine 600 diamond grit, and a fine ceramic hone. The three sided section of the rod rotates and is held in place by fairly strong detents, and there’s a long pinch grip at the top of the rod for you to operate it with. Just like the Knife & Tool Sharpener (and any sharpener in general principle) you start with the lowest grit and run the rod from the heel to the tip, pulling the rod outwards as you go, to evenly strike the surface of the edge. There are compression fit O-rings on the ends of the sharpening rod to allow you to set the depth you want to sharpen (based on the length of the blade) – I left these all the way out to do the most sharpening per swipe of the rod as possible. Once you’ve run the rod over the edge enough to establish a burr you can feel with your fingernail, you press the back of the clamp collet mount out so you can flip the knife over and repeat the process on the other side. You then step up through the grits to sharpen and then hone the edge.
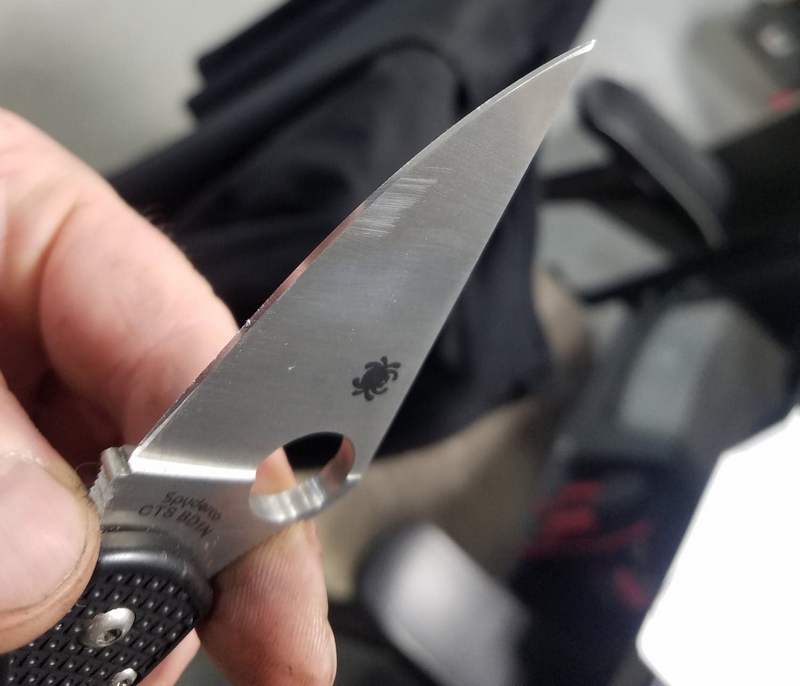
Issues? For me, very few. This sharpening kit hits the important points – diamond abrasives, spherical bearing pivot for accuracy, fine tune edge adjustment, easy to use. The tri-abrasive rod itself is the limiting factor, higher end sharpeners like the KME give you many more options for abrasives –and while you can order replacement abrasive plates from Work Sharp, they’re just the standard 320/600/Ceramic, with no other options. A lower grit plate for faster stock removal wouldn’t go amiss here. Also, the narrow pinch grip on the back of the abrasive rod will cause your hand to cramp up if you’re sharpening for very long. But among all the sharpeners I’ve tried out to date, this Precision Adjust sharpener has given me the cleanest, sharpest edges. I’m sure you can get better results with a KME, but the price difference between the two is a whole pretty nice knife itself – hard math to get over, if you ask me.
To sum up, in this Work Sharp MK2 review: Which sharpener should you get? Well, obviously, both: sometimes you want to sip on some bourbon and put a laser edge on your Sebenza while you listen through an entire live recording of a Pearl Jam concert. Sometimes your work EDC isn’t cutting through the seventeen individual plastic bags you need to open to get a recall done and you just want it sharp enough to cut stuff right now. They’re just different tools for different jobs. I like the Precision Adjust better because knives are my hobby, but I really appreciate having the Knife & Tool Sharpener Mk2 in my toolbox at work because knives are tools.
Work Sharp Knife & Tool Sharpener Mk.2
Quality/Performance - 86%
Value for Money - 76%
81%
The Knife & Tool Sharpener Mk2 and Precision Adjust are both great sharpening options for your arsenal
