


We independently evaluate all recommended products and services. Any products or services put forward appear in no particular order. If you click on links we provide, we may receive compensation.
I was recently asked about what sharpening system I use these days. Well, here’s my story on how I discovered the Wicked Edge sharpening system and my experience using it.
![]()
 I spent a few years trying out different sharpening systems from Grandpa’s old Arkansas Stones to a Lansky system but none of them really clicked with me and did not seem very intuitive, repeatable or all that accurate. Those few characteristics are important as each time you sharpen your knife it removes metal from the edge and thus eats into the overall service life of your valuable and often-times costly tool. Therefore it’s important that your sharpening is accurate and repeatable, removing as little material as physically possible to prolong the service life of your knife.
Once I figured out what I wanted in my sharpening system I just needed to find a product that suited my particular needs. I set out on a mission during Blade Show 2014 to find the perfect knife sharpening system. After looking at various systems such as Work Sharp, Edge Pro-Apex, Spyderco’s Sharpmaker and all the random assorted loose stones I finally settled on the Wicked Edge to sharpen my knives.
Wicked Edge is unique as it has a vise in the center to clamp the knife and on either side there are two arms with sharpening guides attached. These arms and guides allow you to precisely control the exact angle you want your knife to be sharpened at. The cool thing about this is once you have set the angles and sharpened the knife it’s 100% repeatable when it comes time to touch up again and very, very accurate.
Another benefit of the Wicked Edge system is that it has two sets of stones, one for each side of the knife. This allows both sides of the knife to be sharpened simultaneously unlike the Edge-Pro Apex and the Lansky systems. The stones that Wicked Edge utilizes are also diamond stones with the basic kits coming with 100, 200, 400, and 600 grit. The utilization of diamond stones allows even the toughest of steels to be sharpened relatively easily (it took me 25 minutes to sharpen a Spyderco ZDP-189 blade at 64.5 Rockwell!).
Wicked Edge
Performance
Ease of Use
Value for Money
Sharp
If you're willing to make the investment, the Wicked Edge will make short work of bringing life back into your knives.
The cost of the most basic Wicked Edge package is about $300 plus $65 for a base to mount the system to (otherwise you’ll mount it directly to a table or bench). The basic package is great but if you can afford a little more I recommend getting the Pro-Pack II upgrade kit at $150 as that contains the micro adjustable arms shown in my run down of how to use the system. An Angle Cube is also a worthwhile investment generally running around $30 on Amazon. Finally, I would recommend getting the 600 / 1000 diamond stones and the 14 / 10-micron leather strops at a minimum. This would bring the total cost of the recommended kit to about $655 dollars. Yes, it’s a lot of money but if you’re serious about your knives it becomes a no-brainer.
Keep in mind that this system was designed from the ground up to be the best sharpening set up ever made cost be damned. If, like me, you own numerous expensive custom knives this is the only system accurate enough, in my opinion, to be trusted with confidence each and every time.
The results I’ve obtained using the Wicked Edge are truly amazing. When I put a full mirror edge on my knives (as outlined below) they can literally whittle hair and “pop” the hair clean off your arm! If you are so inclined you can turn the Wicked Edge into a small business sharpening for the local population or at the various shows. I know several people who do this on a regular basis.
I’m not disputing that the other systems out there can get your knives equally sharp but the Wicked Edge is the cream of the crop when it comes to accurate, repeatable results in my opinion. For quick touch ups of my budget knives I’m happy to hit the Sharpmaker but when the super-steels need to regain their edge I go straight to the Wicked Edge.
How I use the Wicked Edge
My buddy Deal Crail of Crail Edge Knife Sharpening helped me pull this detailed walk through below showing how to get the most out of the Wicked Edge system.
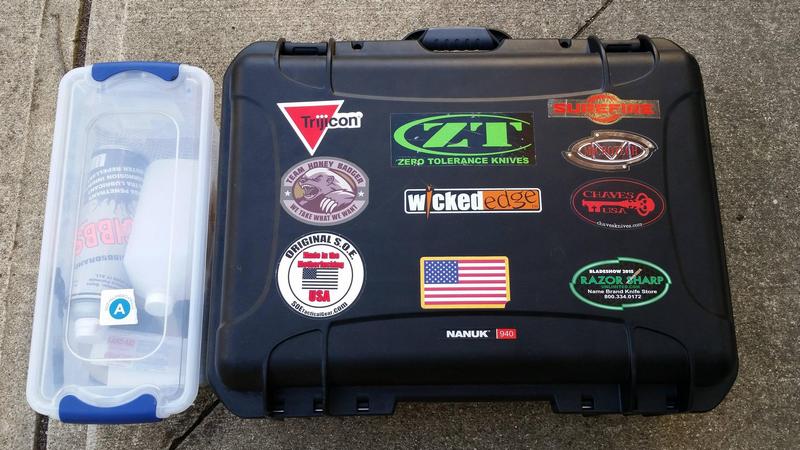
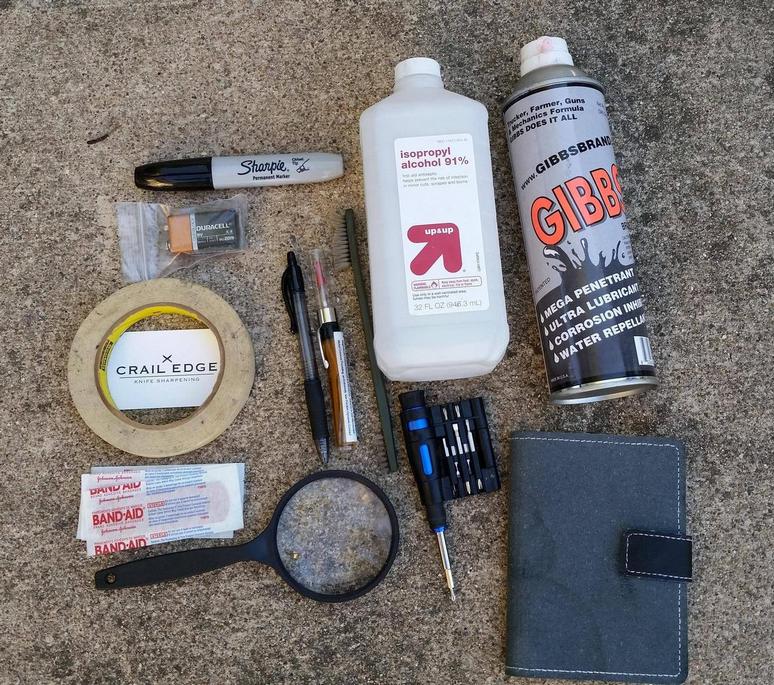
I have the hard shell case for my Wicked Edge as I often take it with me to shows and events where I may need to sharpen. The hard case makes carrying the thing around a whole lot easier. The small plastic box off to the side holds random odds and ends that help and cannot fit into the hard case.
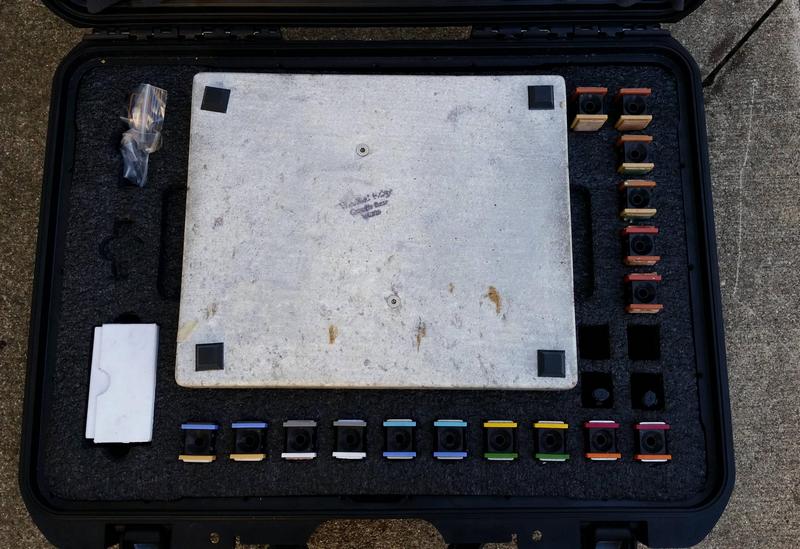
This is the interior set up of the Wicked Edge hard case. The Wicked Edge is actually upside down in the case with the base on top and the center vice going down into the foam of the case. Notice how well different stones are laid out in the case so you can arrange them in the order you want to make the sharpening progression easier. The different components also have specific cut-outs and the white box off the bottom left hand side is for the angle cube. In the top left there is a small spot for random stuff like a spare battery for the angle cube (trust me get a spare).
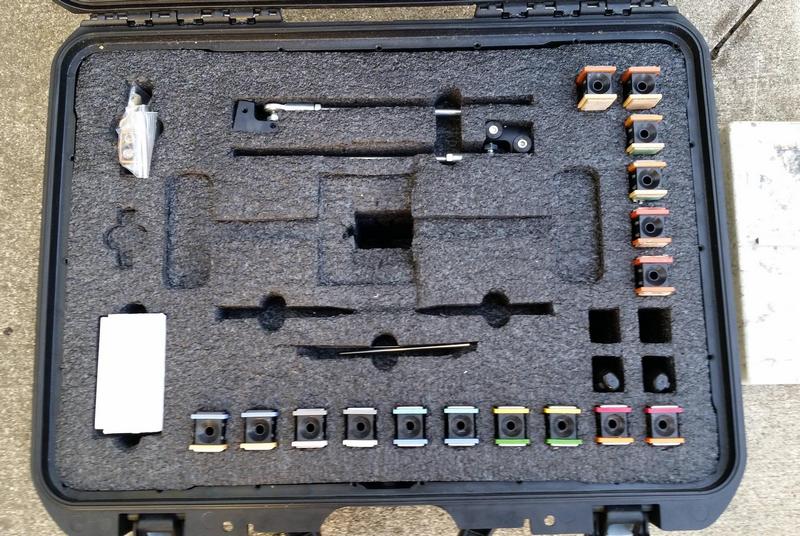
You can see the cut out for the Wicked Edge better here. The vice goes into the deep center hole and the foam has indentations for the arms so they are not put in any undue stress. Above in the top center of the case is where the sharpening guides are placed and they cannot be seen when the Wicked Edge is in the case.
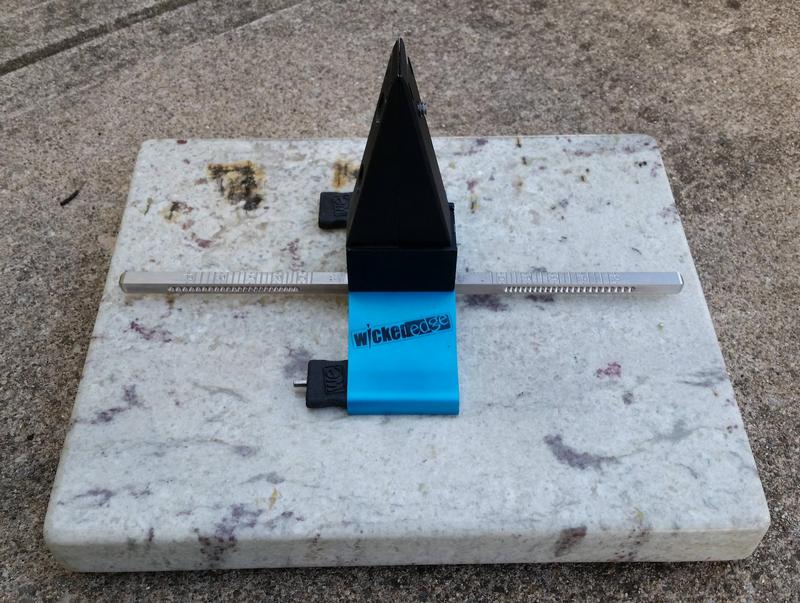
Here is the just basic vise, base and arms of the Wicked Edge. Once removed from the case the sharpening guides just slide over the arms and once set to the proper angle are screwed into the arms. I have the optional Granite base as the added weight keeps the system stable when re-profiling and helps cut down on undue movement.

Here’s the system with the sharpening guides attached. The guides just slide on very easily, note that I have the upgraded Pro-Pack arms these are the ones to get as they allow you to control the angle you sharpen at very accurately unlike the original Generation 1 sharpening guide.
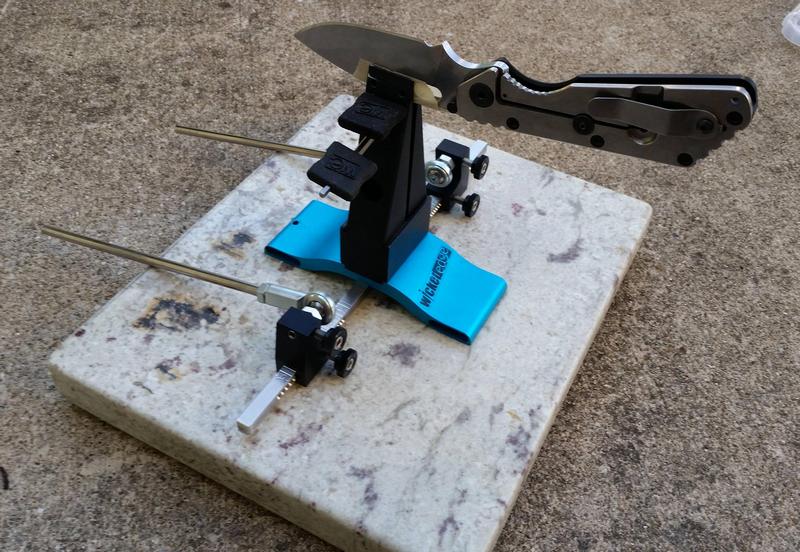
You use the two included keys to place the knife into the vise jaws to secure it for sharpening. Notice how I have the blade taped up this prevents the aluminum vice from scratching the finish of the blade.
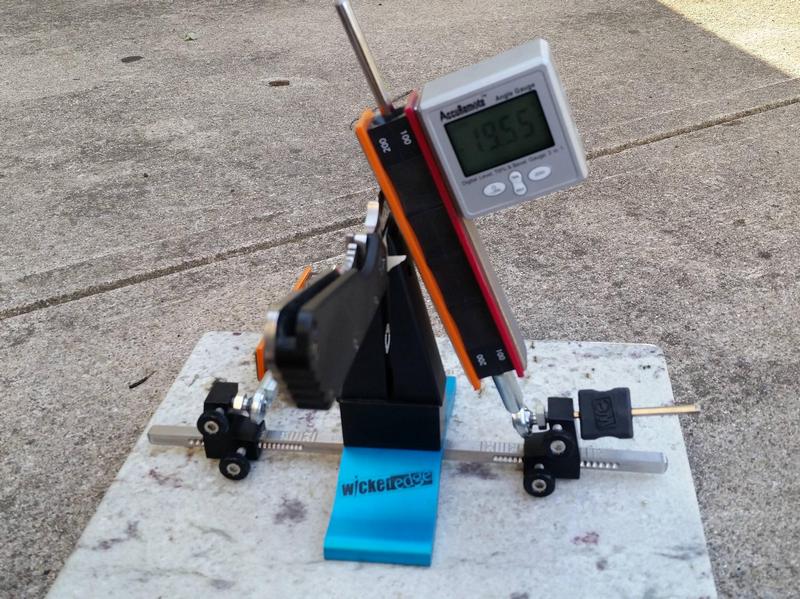
Once the knife is secured into the vise properly using both set screws you then slide one of the diamond stones onto the sharpening guides. Once the stone is on the guide you then attach the angle cube to the stone (it attaches automatically as the angle cube has magnets on it). With the angle cube you can adjust the angle the guides are set at to your particular preference (I prefer 36 inclusive myself).
The key attached to the side of the sharpening guide is used to control the set screw inside the guide that allows you to control the angle extremely precisely. Then once the angle of sharpening is set you proceed to sharpen. The guides make it all very easy - with even pressure applied a razor sharp blade is all but guaranteed.
To see proper technique when using the stones I recommend watching this video from Wicked Edge:
The diamond stones do 90% of the work containing the 100-1000 grit sections of the process. Really, for a general EDC blade these three stone sets are all you realistically need. The diamonds make it very easy to sharpen even the hardest steels like Spyderco’s ZDP-189 or M390 that routinely present great difficulty to novice sharpeners.
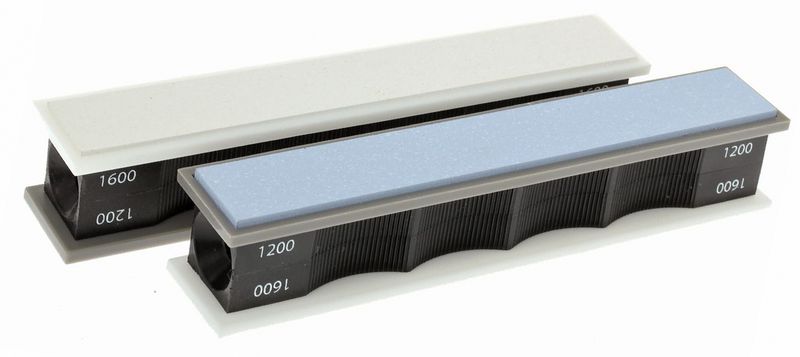
The ceramic stones really bring an edge out and set the stage for the leather strops. The 1200 / 1600 stones are the ones that do the most in my opinion as they refine the edge and allow it to take a nice mirror once the leather strops are applied. I use the super fine 1.4 / .6 micron ceramics to really polish and remove scratches from the diamond stones. The only downside is they are the most expensive stones at about $120 so unless you are very serious about a mirror edge you can skip these.
The leather strops are the real trick to getting the knife scalpel sharp with the much sought after mirror edge. The leather for whatever reason just makes a sharp knife crazy sharp. All the knives I process to a .5 micron mirror finish can all whittle hair. I recommend that everyone get at least the 14 / 10 micron strops as the leather really helps refine any edge.
Also, when you use the strops bring in the guides two degrees to prevent an rolled edge as you have to remember the leather is soft so if you use the strops at the same angle you used the diamond and ceramic stones the soft leather will bend and conform to the apex of the edge actually deforming it. For example, if you sharpened the knife at 18 degrees per side bring the strops in to 16 degrees per side to prevent a rolled edge.
Limitations
No sharpening system is perfect and the Wicked Edge is no different. Here's a few limitations that you may encounter but I have never felt like these are major issues by any stretch.
- The clamp will struggle to get a clean grip on certain blade shapes. For example the Benchmade 530 has the thickest part of the blade running down the center which doesn't allow for a clean-clamp. This can be remedied using the application of some tape to the blade.
- It can be difficult to put an acute angle on the smaller blades with very little width (think Swiss Army knife). What happens is the shoulder of the clamp gets in the way of the stones. You can remedy by lifting the blade up a little so it's not sitting on the keys but then that limits your ability to repeat exactly at the same angle.
- Blades that taper on the spine also have problems with a snug clamp so again you may need to use some tape.
Conclusion
To sum up, in this Wicked Edge Knife Sharpener review: A dull knife is near worthless so you should be looking to keep a razor edge on all of your blades. That means you'll be spending time on the sharpener, no matter what type of steel you have. If you're serious about your knives then why skimp on so-so sharpening systems? I continually scratch my head at folks who invest in $200, $300, $400+ knives and don't given them the treatment they deserve. So, overall I highly recommend the Wicked Edge system. It's not cheap but overall well worth it in my experience.
The Good: Well designed system, simultaneous sharpening of both sides, 100% repeatable process in most cases, lots of accessories
The Bad: Pricey, some limitations do exist (like with all sharpening systems)
Bottom Line: It ain't cheap, but the Wicked Edge is arguably the best sharpening system out there
